August 22, 2012
How To Configure Fields & Contents in ReQtest
One of the main benefits of using ReQtest is that configuring it to suit your own needs is easy, simple and fast.
In this tutorial you’ll read about just how easy it is to configure a template, for example the template used when creating a new bug report, requirement, test case or test run. All templates in ReQtest are infinitely customizable so you can get them to fit your needs in a very short time.
First, let’s take a look at how the bug report template looks before you change it. Go to the bug reports section, then click ‘Create bug report.’
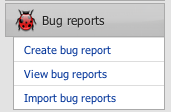
What you see next is your current template, which may or may not be what you need. The blank bug report you see contains different fields such as subsystem, owner, title, error description and so on.
It is easy to add and remove fields, to decide which fields are mandatory and to change the order in which the fields are displayed in the form, and this applies to all templates, not just the bug report template.
Now, let’s see how to customize the template to suit your needs. Go to settings, then field settings. You will be shown the field settings for requirements, test cases, test runs and bug reports, each on a different tab. Choose the template you want to edit and customize by clicking on it.
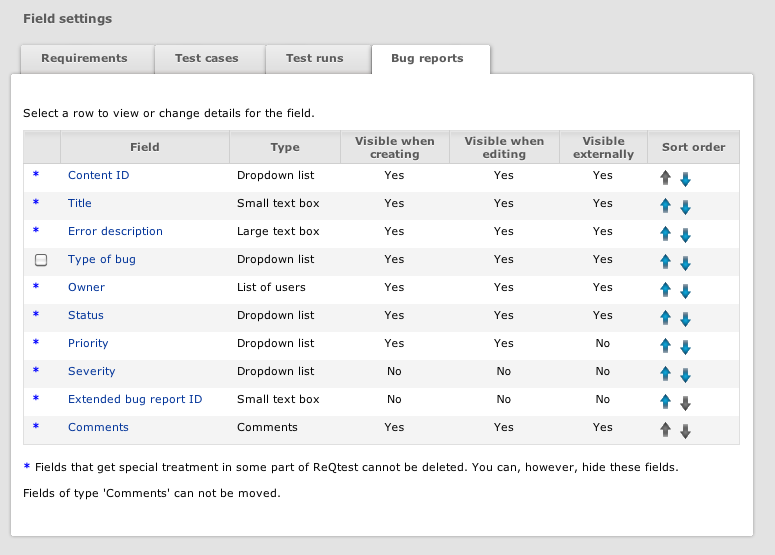
The blue arrows on the right allows you to easily arrange the order of the fields as they appear when you create a new bug report or requirement.
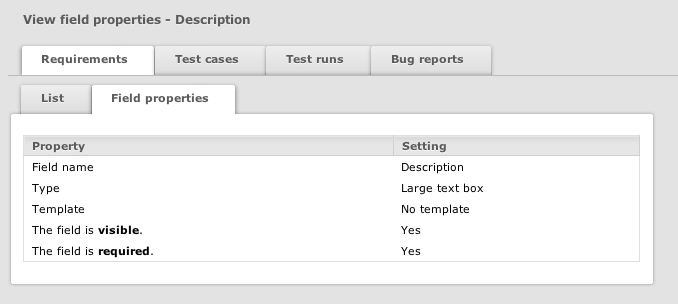
When you click on one of the fields you will be taken to the Field Properties section. For example, I chose the Description field settings, so I’m shown that the field name is Description, that it’s a large text box, has no template and that the field is visible and required when creating a new requirement, as shown below.
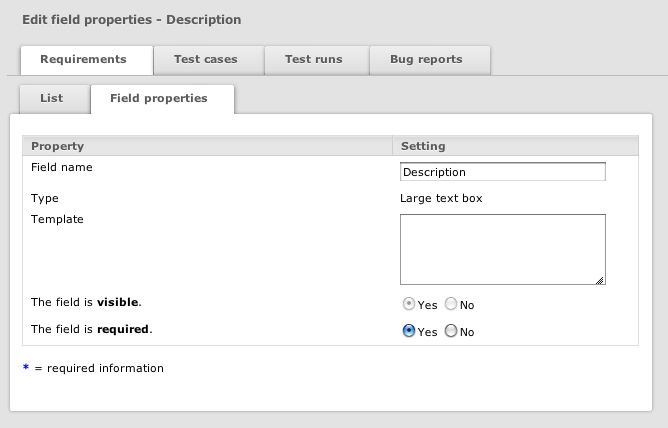
If we want to alter this field, click the blue Edit button at the bottom of the screen. This will take you to the below screen where you can rename the field and change things around as you wish.
Now, what if we want to add a field to our bug report or requirement template? Simple, just click on add field at the bottom of the Field settings screen and you’ll be taken to the add field screen.
You can add small or large text boxes or a drop-down list. You will name your field and set the rules for the field, for example if the field should be visible when creating a new bug report or if it is required when creating a new bug report. For instance it makes sense that a bug report or requirement has a title, therefore title is both visible and required when creating a new bug report or requirement.
On the other hand, the comments field is used by the developer when fixing the problem and is therefore not visible when creating the bug report, only when the bug report is edited.
In our example below, we are creating a drop-down list called Origin of problem to our bug report template, as you can see below.
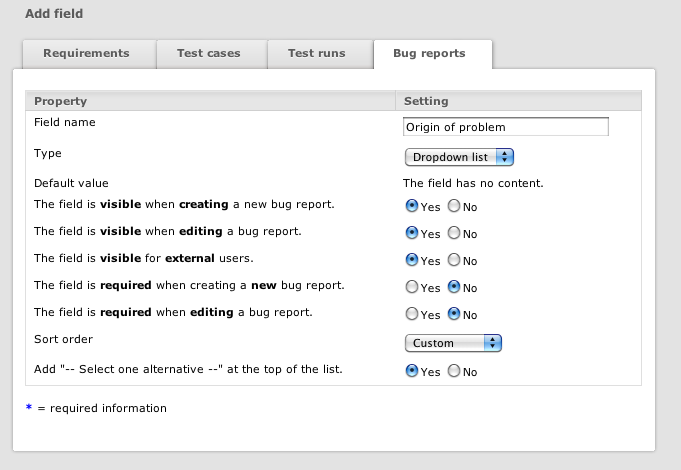
When you’re all done, click save. If you’ve chosen to add a drop-down field, you will need to add content to it, as below. For example, we’re adding a number of options to our Origin of problem to our drop-down.
Click save and you will be warned that the drop-down list has no content. Click the content tab, then the blue ‘Add’ button at the bottom of the screen and add content as needed, in our case the different options we have highlighted could be the origin of the problem.
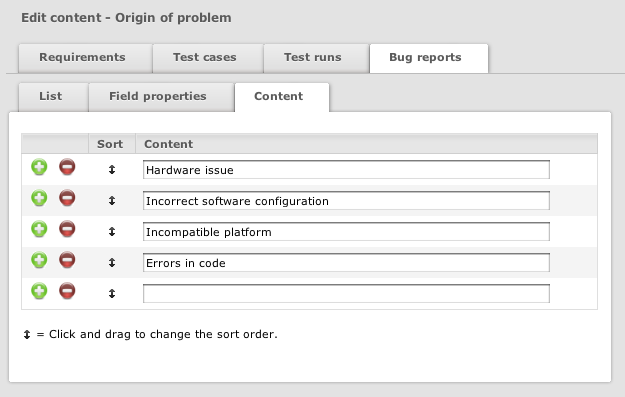
Bear in mind you’ll need to this once for every choice you want to include in your drop-down.
As you can see, it’s really easy to configure a template in your ReQtest project, which of course means it doesn’t take days to configure a project to your needs, rather just 1 or 2 hours.
To watch a video tutorial on how to carry out the above steps, play the video below-
[responsive_vid]
Share article