February 18, 2013
How to create and work with bug reports in ReQtest
Bug reports are one of the most key and central features of ReQtest. In this post, we’ll take a look at how to go about creating and working with bug reports, as well as how to assign them to members of your team, attach files to a bug report and few other things, all related to how ReQtest handles bug reports.
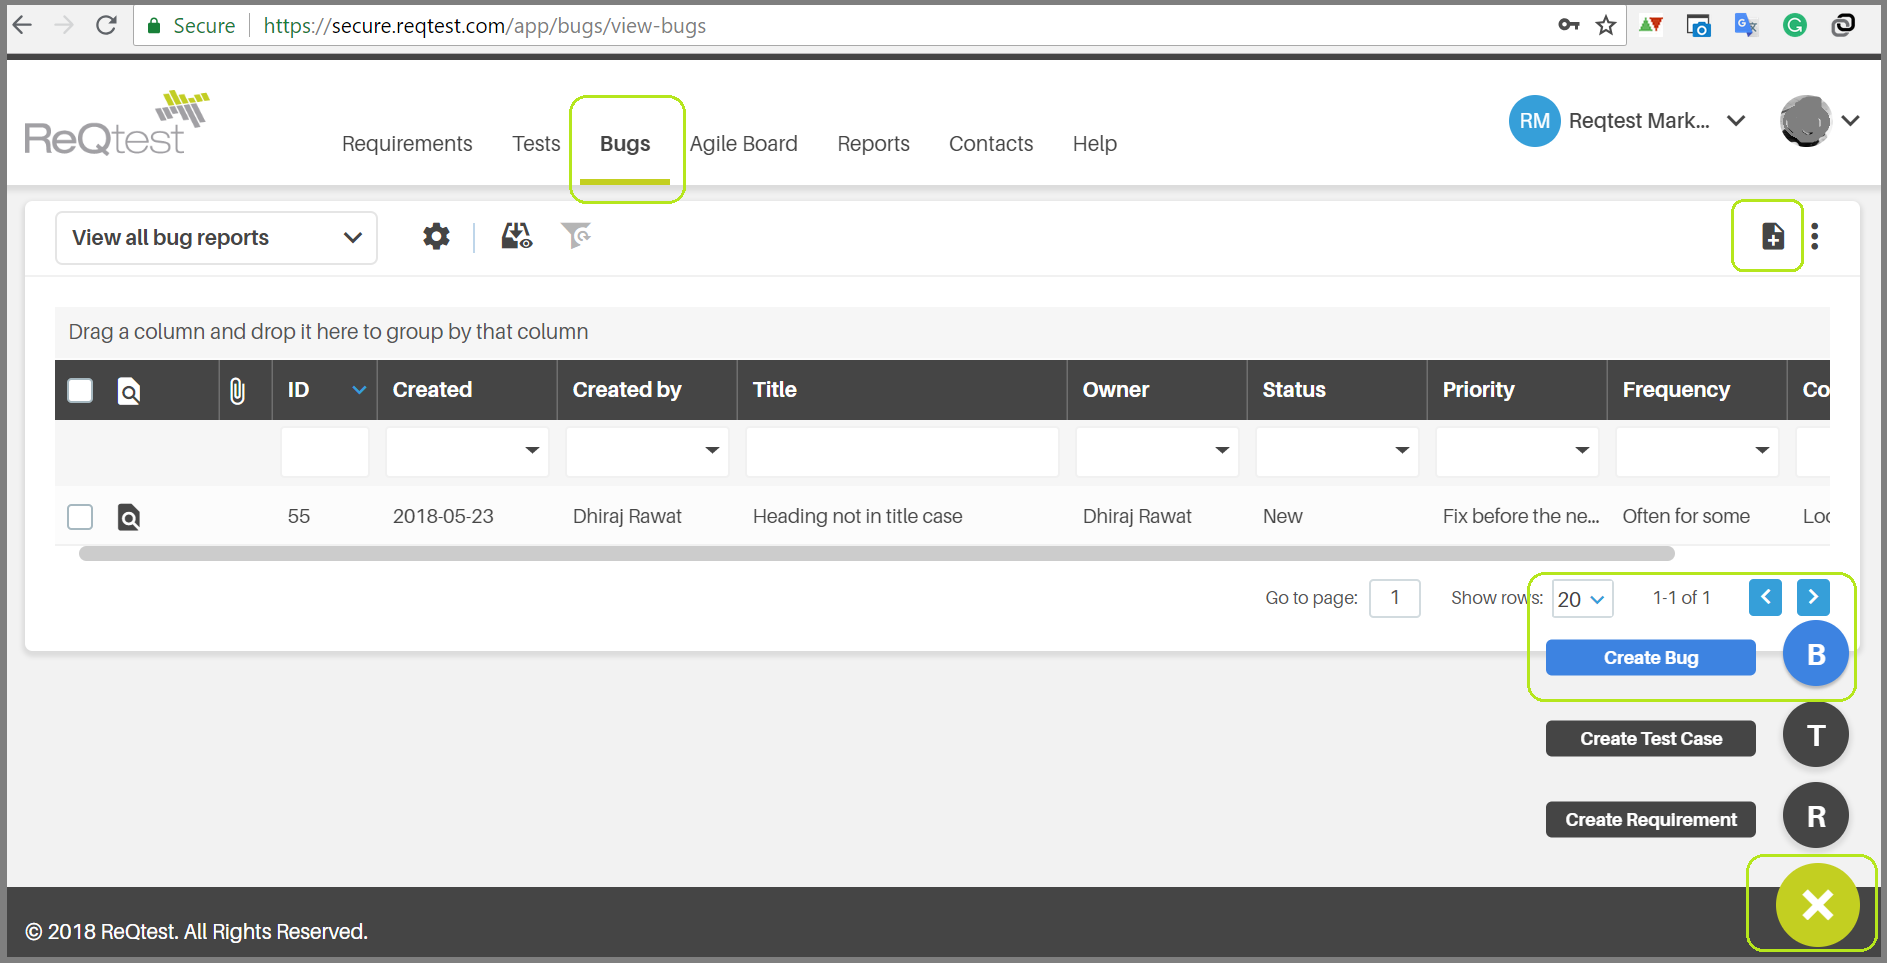
To create a bug report, use the icon on the top menu which says simply ‘Create new bug report’, or use the left side navigation, under ‘Bug reports’
A blank bug report will be loaded, according to the template set for the project. You can read all about setting up and changing templates in this post – https://reqtest.com/blog/howto/how-to-configure-fields-contents-in-reqtest/
 Fill out the blank bug report as required, perhaps in a similar way as shown below, or as dictated by your project template. In the case below, I am logging a bug in which log in functionality does not work. Click the blue ‘save’ button on the bottom of the screen when you’re done.
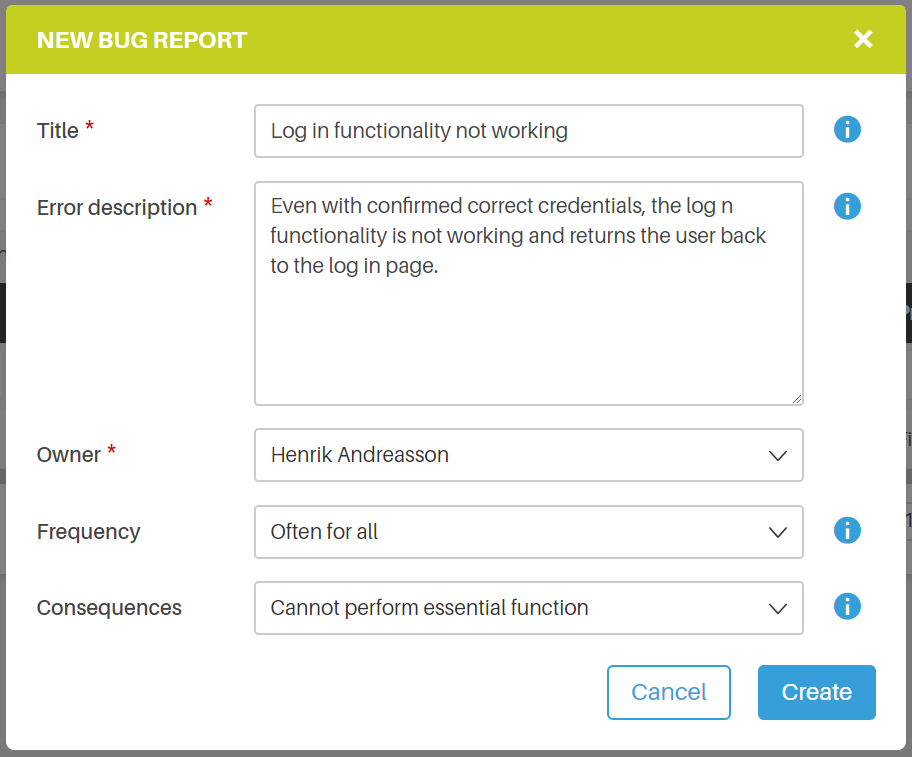
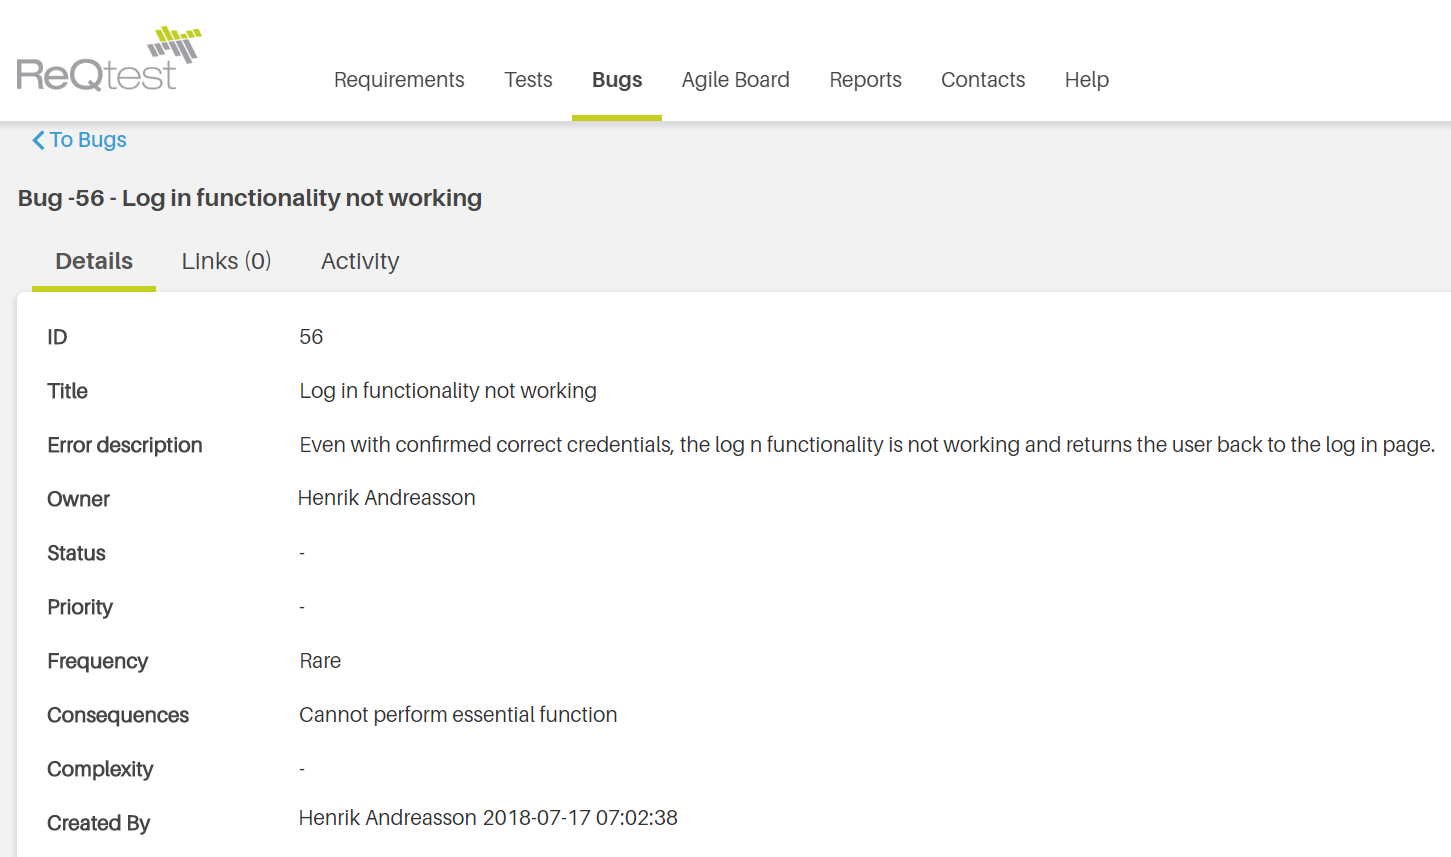
Among the labels you can include in your bug report template you can find ‘priority’, ‘severity’, ‘based on test case’, ‘source’, ‘motivation’, ‘estimated time’ and so on, as well as the more obvious labels such as the title, the ID, description and comments.
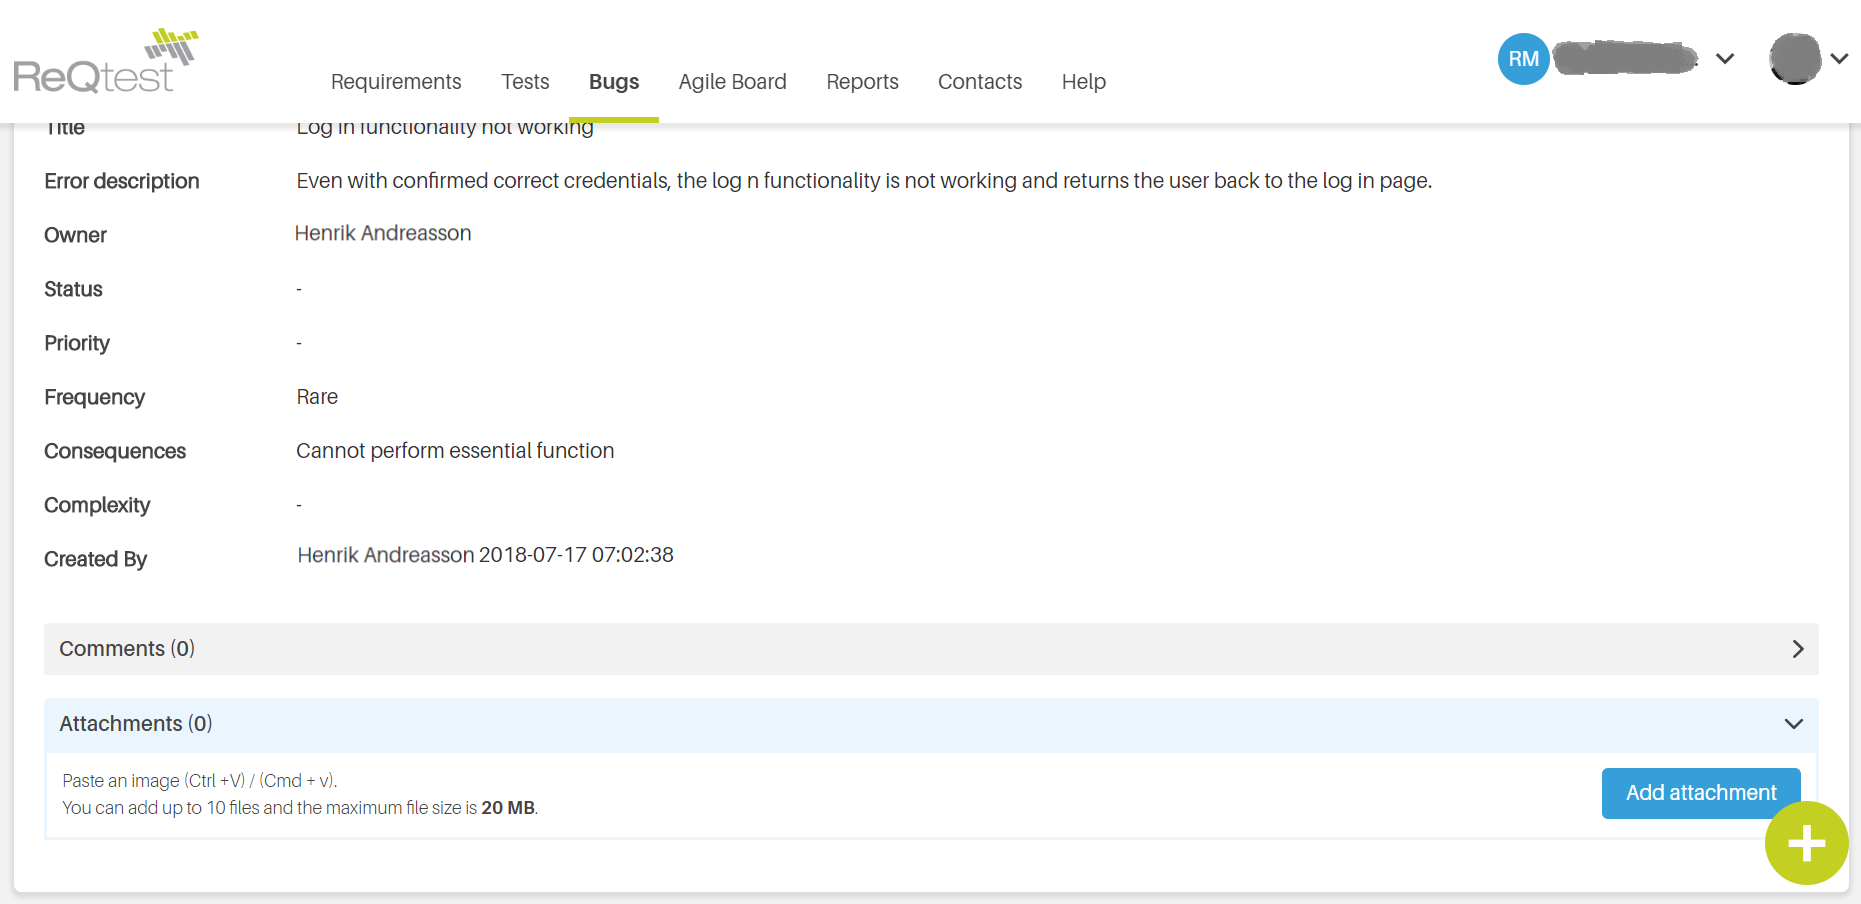
To attach a file, simply click through to the second tab of a saved bug report as show below.
Click browse and locate the file you want to attach to the bug report.
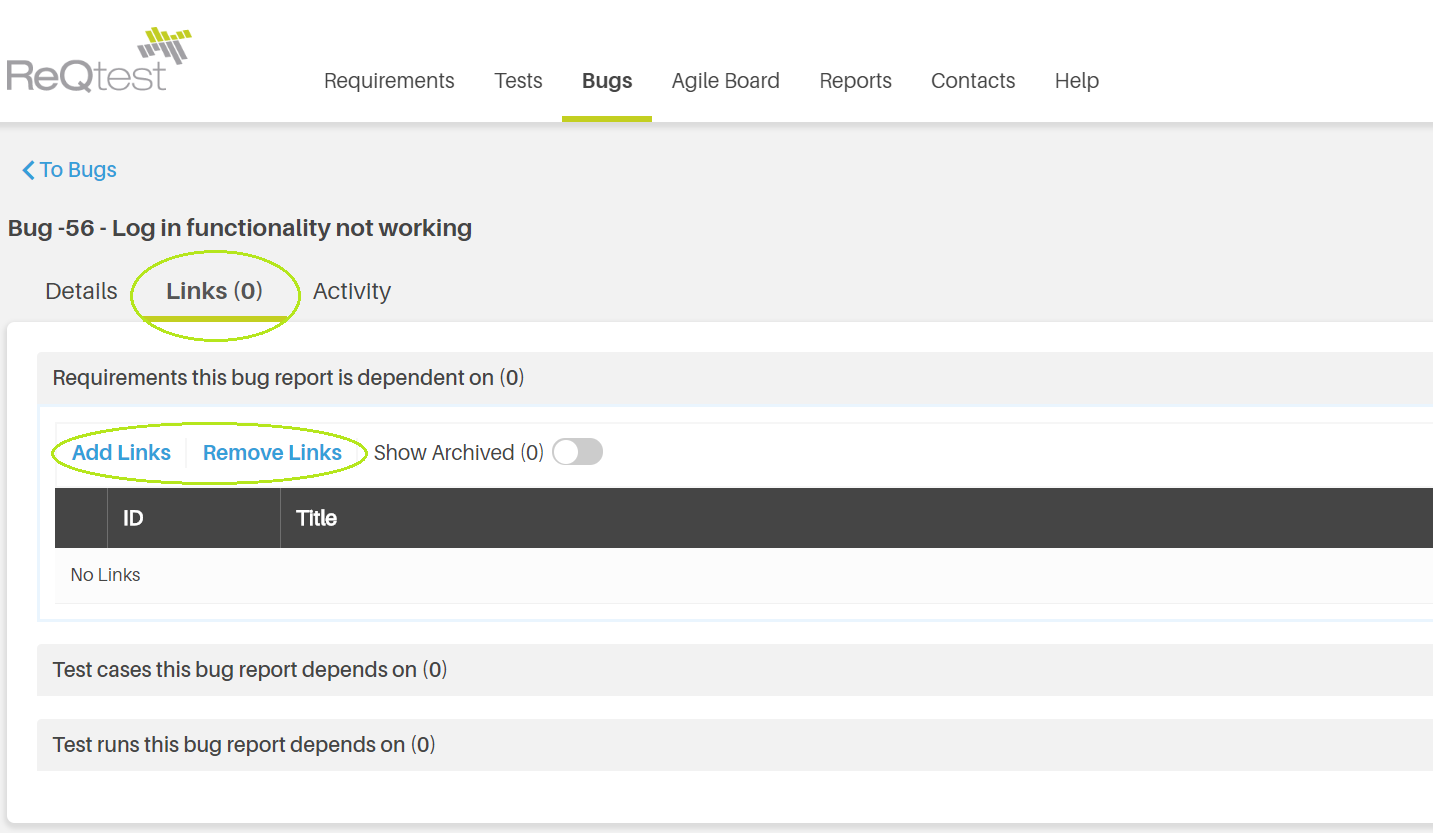
The second tab on top of a bug report is the ‘Links’, and these are items such as requirements, test cases and test runs which may be somehow linked to this particular bug report. For example, a tester who is executing a test case may want to link a failed test case to a bug report, so that whoever will try and fix the bug can see exactly what the test case involved. Links from bug reports to test runs are created automatically when a bug report is created from within a test run.
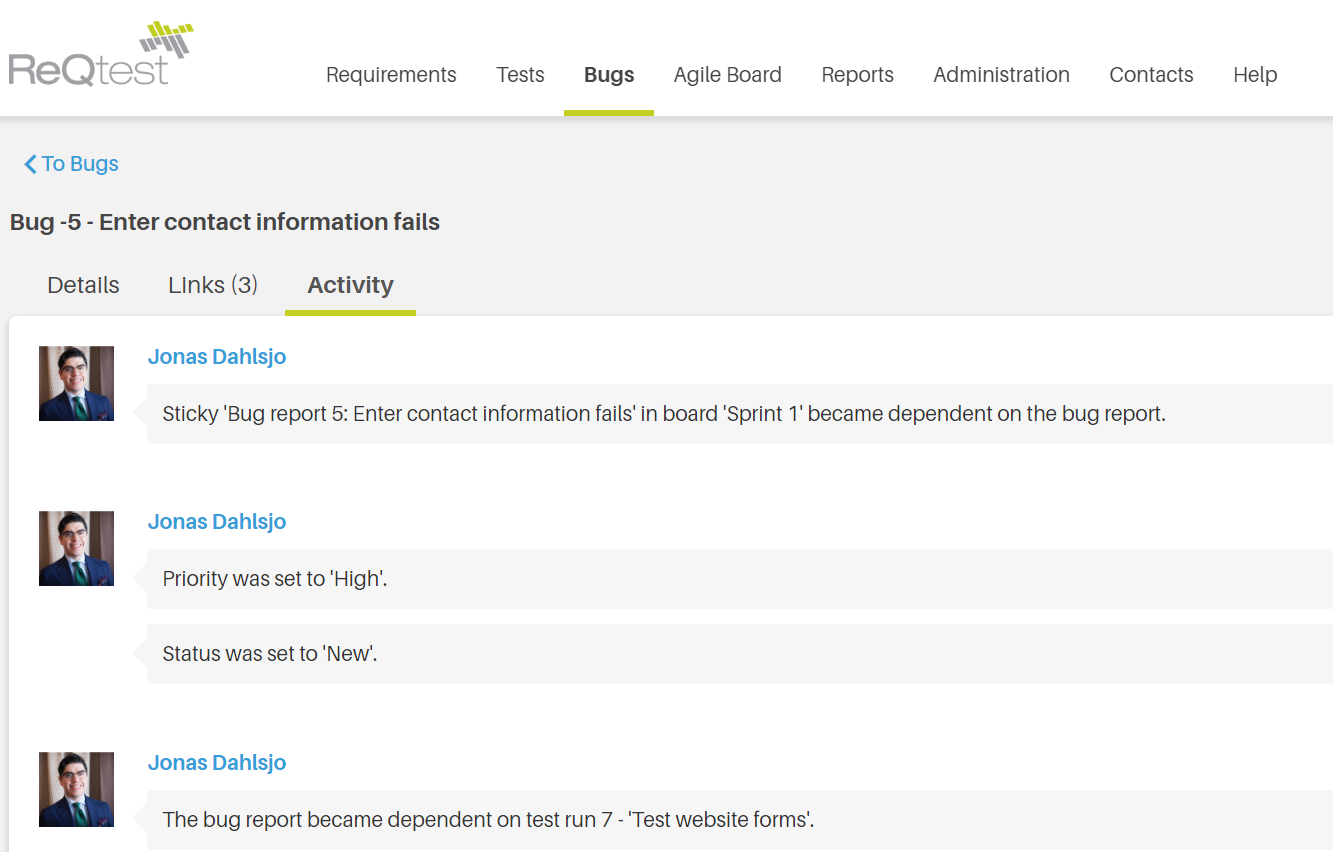
To view the bug report’s history, click on the tab,‘Activity’. Here you can see all of the bug report’s history, from the day it was created to every single comment and change ever made to it, as in the image below.
When whoever is assigned the bug tackles the issue and wants to change the report, they will go to ‘my bug reports’ select the appropriate bug report and click edit. Then they will change the status to, for example, ‘Resolved – ready for test’, or ‘Can not fix’. They can then change the owner back to whomever created the bug report, or assign it someone else, perhaps someone higher up in the chain, like a test manager.
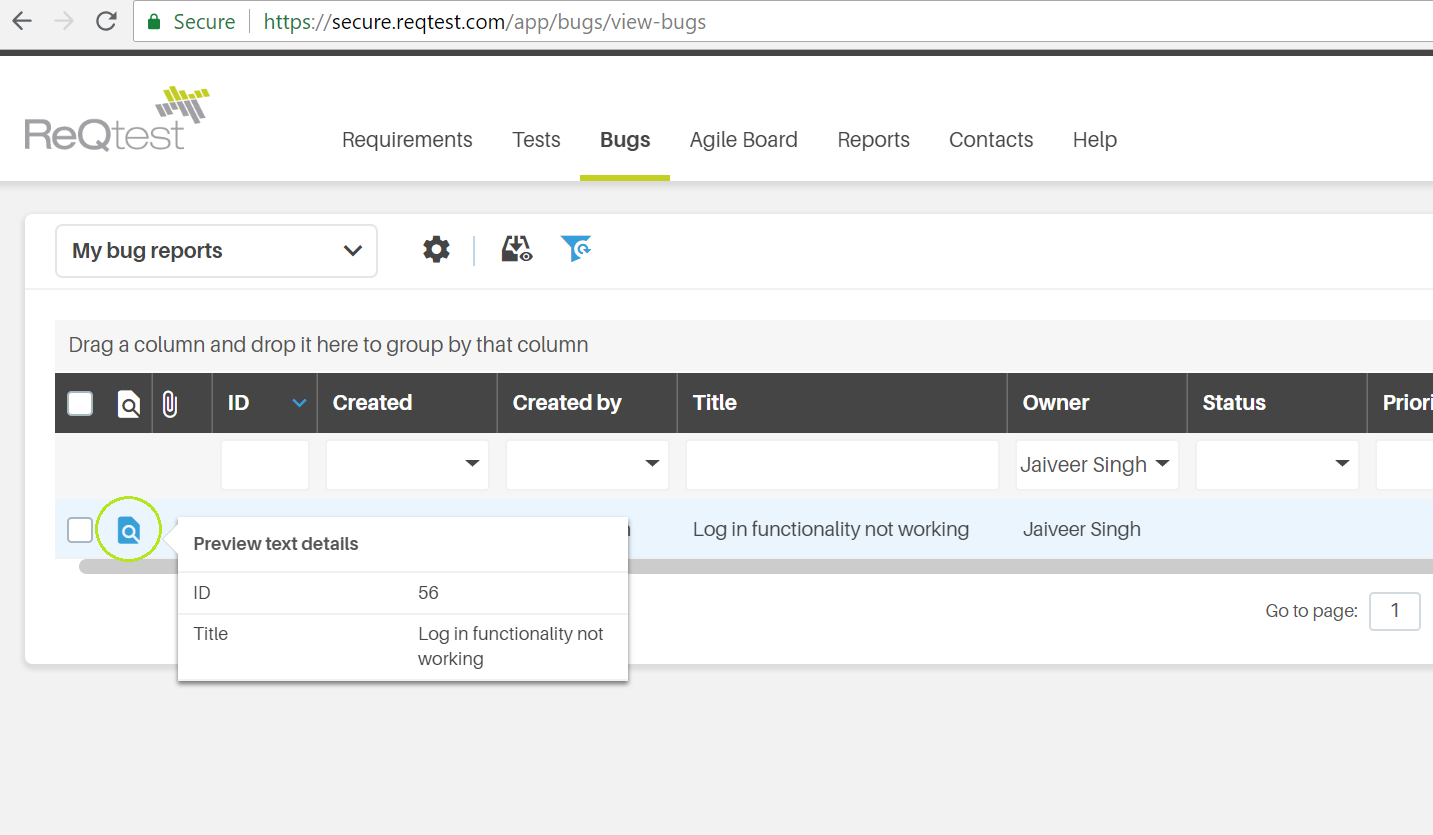
BONUS TIP – When you have a great big list of bug reports in front of you and you don’t want to have to click into each one to find out what they’re about, simply hover on the preview icon as shown below, and a popup preview window of the bug will be displayed, saving you precious time.
For a full overview of bug reports and how they work in ReQtest, you can also take a look at this Youtube video channel
Share article