August 5, 2012
How to Export Data from ReQtest to Excel
ReQtest supports a feature which allows you to export data from ReQtest for use in Excel. Most of the reports you need in your daily work are in ReQtest already, but sometimes you might need a specific report that is not possible to create out of the box. Let’s learn how to Export Data from ReQtest to Excel.
In this situation it is very easy to export your data to Excel and create the report or chart you want there. The export feature can also be used to archive a project on your local machine if you don’t want to use the archive features in ReQtest.
Let’s assume that you’re in the Bug Reports section, viewing all Bug Reports in the Grid View, so in front of you have a list of all the Bug Reports in your project. On the top right of the screen there is an Excel icon, and clicking it will start the export process.

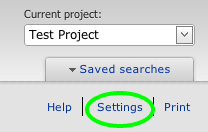
However, what data is going into my export? You can control this by going to Settings in the top right corner of the page, between ‘Help’ and ‘Print’. Click settings and you will be taken to the settings for that particular area, in this case, the bug reports listing.

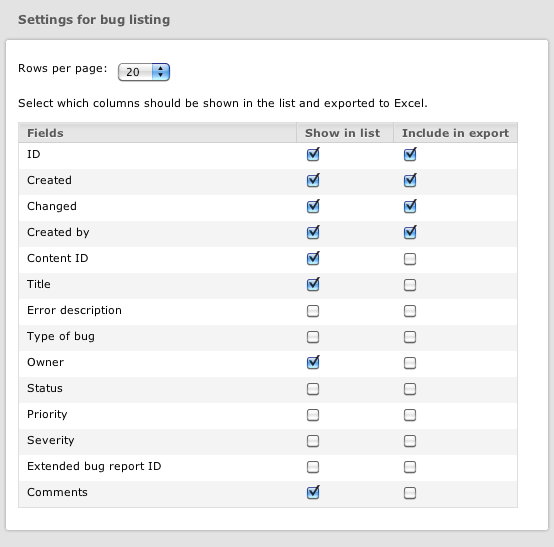
You will have a list of fields, for example the bug report ID, date created, title, severity and all the other fields that you have defined in your bug report form.

There are also two columns with checkboxes. The first column, called ‘Show in list’ toggles display of that particular parameter when looking at bug reports in a list. For instance if you tick “Title”, the bug reports’ titles are displayed in the list of all bugs when you choose “bug reports/view bug reports”. The second column, ‘Include in export’, includes the parameters of your choosing when exporting data from ReQtest for use in Excel. For example, in the case of bug reports, you might want to export Bug Reports which include data such as ID, Date Created, Last Changed, Created by, Title, Error description, , Owner, Status, Priority and Severity.
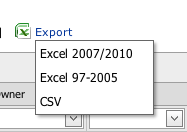
When you’ve chosen what columns you want to include in your export, just click save at the bottom of the screen, then on the view bug reports list, click the Excel icon on the right. You have a choice of 3 formats to export to, Excel 2007/2010, Excel 97-2005 or CSV, depending on what version av Excel you have installed on your computer.

Choose which format you prefer and the export will be started as a download. Since you can export in 3 different file formats you can open the report in Excel, Open Office or other programs that handle CSV or XLS files.
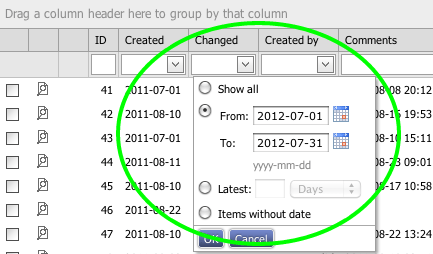
What happens if I have a couple of hundred bug reports and I only want to export some of them? Easy. Use the filters when in viewing bug reports, and filter out any bug reports you don’t need. For example, you can filter only bugs that were created by you, or all bugs not created by you, or all bugs in a certain subsystem.

For example, here, I am filtering out bug reports which were changed in a particular month only.
When you’ve filtered out the bug reports you want or don’t want to have, click “Select…” and then “Select all”. When you export as described above you will only get the bug reports you filtered out.
The export feature is available in lots of places, so you can export bugs, test cases and requirements in a similar way.
For a step by step demo of the instructions above, watch the video below.
[responsive_vid]
Share article