September 4, 2012
How to Import Data into ReQtest
How do you import data, for instance test cases, from Excel into ReQtest? This might be the situation when you have written hundreds of nice requirements or test cases in Excel, or if you switch to ReQtest from using some legacy test management tool
The import feature is very useful in cases when you have hundreds of test cases or bug reports and want to rapidly put them into the ReQtest system. Of course, importing them one at a time and manually would be hugely laborious, but with a few deft touches in Excel you can import thousands of bug reports or test cases straight into ReQtest where they’ll be ready to use, right away.
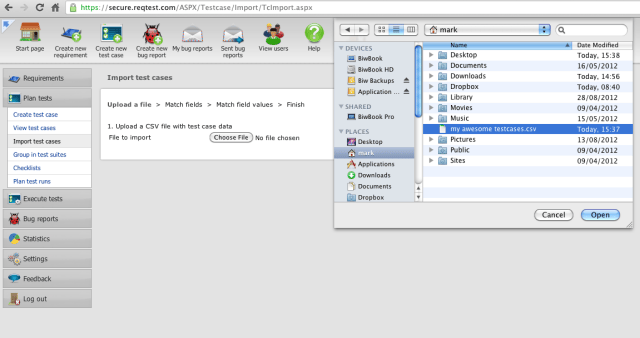
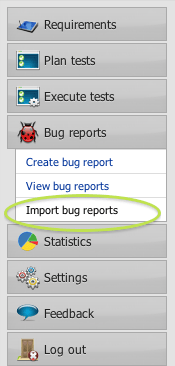
You can easily import requirements, test cases and bug reports into ReQtest. You import test cases by chosing import under the ‘Plan tests’ section of the menu. You will find import functions for bug reports and requirements under their respective menus. Here we demonstrate how to import test cases or bug reports, but the procedure is pretty much the same regardless of what you intend to import.
Click the import button and find the CSV file you want to upload for importing into ReQtest. CSV is a file format that is available in many software packages and also in Excel. In Excel you select CSV when you export things that you later want to import into ReQtest.


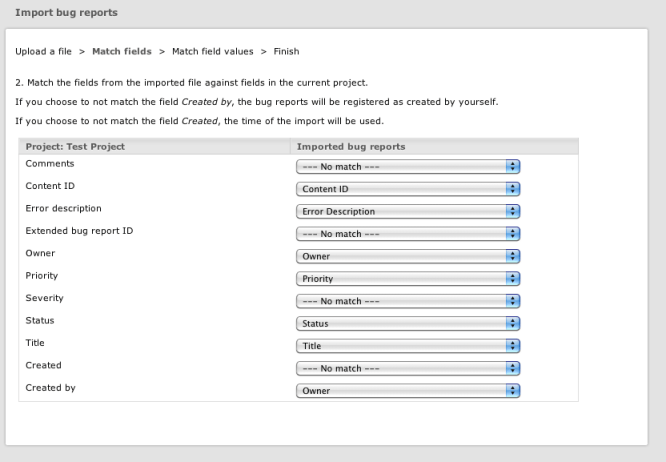
On the next page of the import wizard you will match the fields in your Excel file to the fields that already exist in you ReQtest project.
On the left side of the page your project is displayed, and on the right side the import file is shown, as you can see below. Of course, you can tailor your forms in Reqtest to include more, less or different values to the ones shown below on the left side. Obviously, once your template is set, it is wise to follow the template’s headings and content in your CSV file. This was you’ll save time and be able to quickly match up the values.

Following this, you will need to match up the field values from the imported file against the values in the current project. Of course, these field values can be altered and customised to suit your needs.
When you’re done matching up, just click finish, and you will get a message at the top of the page saying that the test cases, bugs or requirements from the CSV file will now be imported. Just click OK and you’ll be informed that your stuff has been successfully imported.
Watch a video explain how to import below –
[responsive_vid]
Share article
