September 16, 2012
How to use ReQtest in Agile projects
More and more people are using and adopting Agile methodologies such as Scrum. Since ReQtest is a very flexible platform, it is really easy to adapt ReQtest to fit optimally into Scrum projects. It is even possible to configure different project templates so you can use one template for conventional projects and another template for Agile projects.
In this article you will learn more about how you can customize ReQtest to fit Agile projects.
Our team here at ReQtest uses Scrum to develop and maintain ReQtest and of course we use ReQtest to manage our own requirements and testing. The test management features in ReQtest are more or less ready to use in agile projects out of the box so most of this article is about configuring the requirements management module. However you will also get tips about how to use ReQtest for managing testing in Agile projects.
Agile Requirements Management
When working with an Agile mindset you need to be able to keep track of requirements in the product backlog (list of things we should do sometime in the future) and requirements of the sprint backlog (requirements that we are working on in this sprint).
One elegant way to do this in ReQtest is to add a new drop-down field and call it ‘Sprint’. Field values can be:
• Product Backlog
• Sprint 1
• Sprint 2
• etc.
Initially I assign every requirement to the sprint called “product backlog” until I’ve decided during which sprint the requirement is to be handled.
When sprint planning is done, I update the Sprint-field for each of the requirements that I choose. The Sprint field could be set to have “product backlog” as the default value and this can be set in field settings.
Sprint planning
When you are planning a sprint, you select a number of requirements by using the search and filter functionality in the list of requirements. When you have selected the requirements, use the bulk edit feature to assign requirements to a sprint.
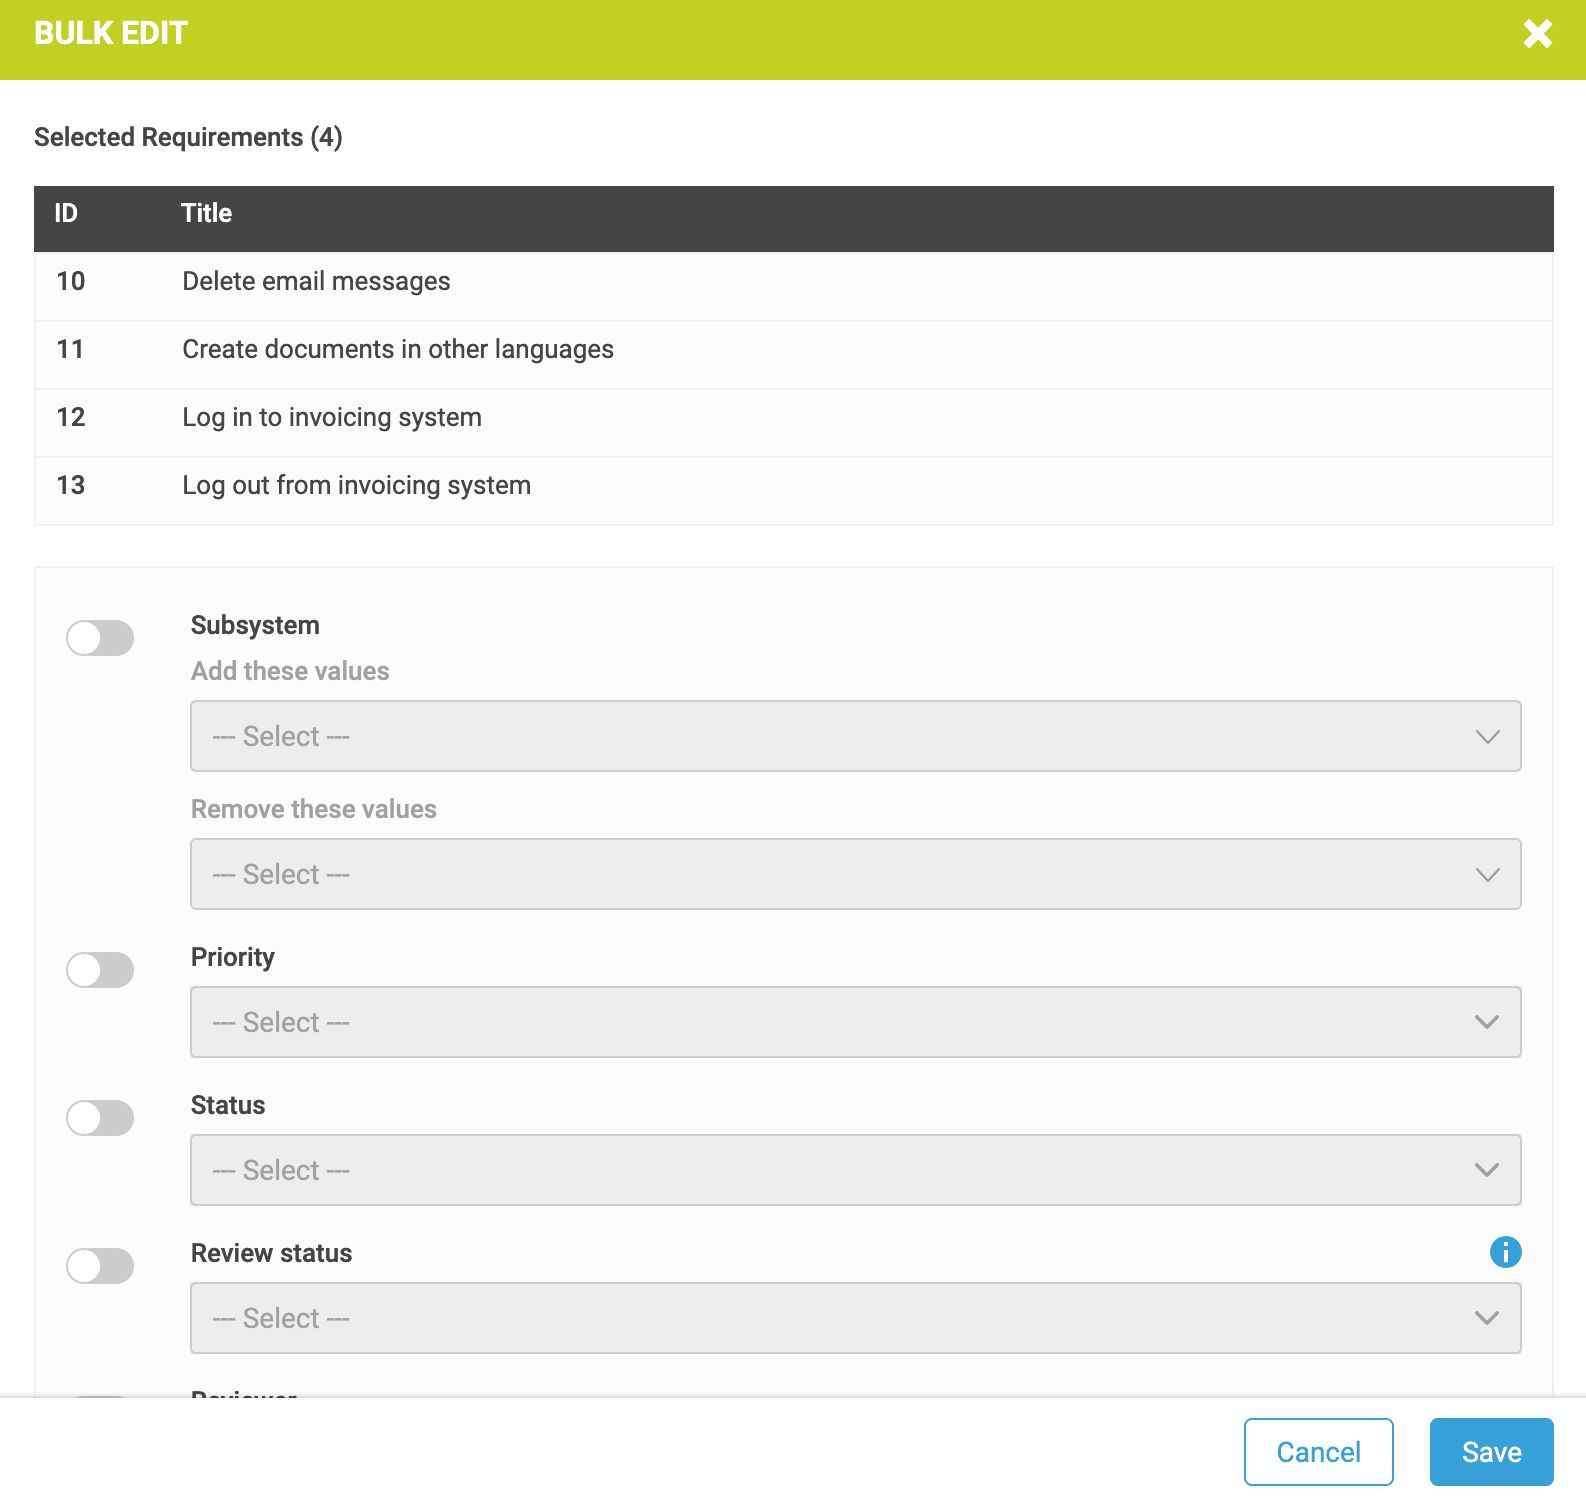
The decision on which of the requirements are to be included in the sprint is often based on the requirements’ priority. Important requirements are to be worked on first and less important requirements are to be worked on later or not at all.
In Agile it is common to use the so-called MoSCoW-scale (Must, Should, Could and Will not). When using the priority field, it is easy to filter out the appropriate requirements for the next sprint.
For example, you can choose to display all the requirements of the payment subsystem that are of must- priority. After you filter them out, you can update the sprint field to add the requirements to sprint #12.
You may ask ‘How do you conclude that a requirement is of priority Must, Should or Could?’
One way is to look at how useful the requirement is to the organization and how high the implementation cost is. Requirements that provide significant benefit and cost little to implement are typically of high priority. Therefore, it is helpful to add two fields for benefit and cost.
I recommend you to use a 4-point scale, with 1 being low benefit, and 4 for the highest benefit and which makes it extremely easy to filter out the requirements which provide maximum benefit at lowest cost. Once again, by using the bulk edit feature, you can easily set the priority of these requirements to “must”.
When the sprint is completed, it is easy to update all the requirements contained in the sprint and set their status to implemented.
Statistics on the product backlog and sprint backlog
When you have divided the requirements into sprints, it is easy to obtain information both about the current sprint and the requirements contained in the product backlog.
Add a filter to the list of requirements and you can choose to view the data in tabular form or as a pie or bar chart. Now you can easily compare sprints. Were there more interface requirements in this sprint or in the previous on?

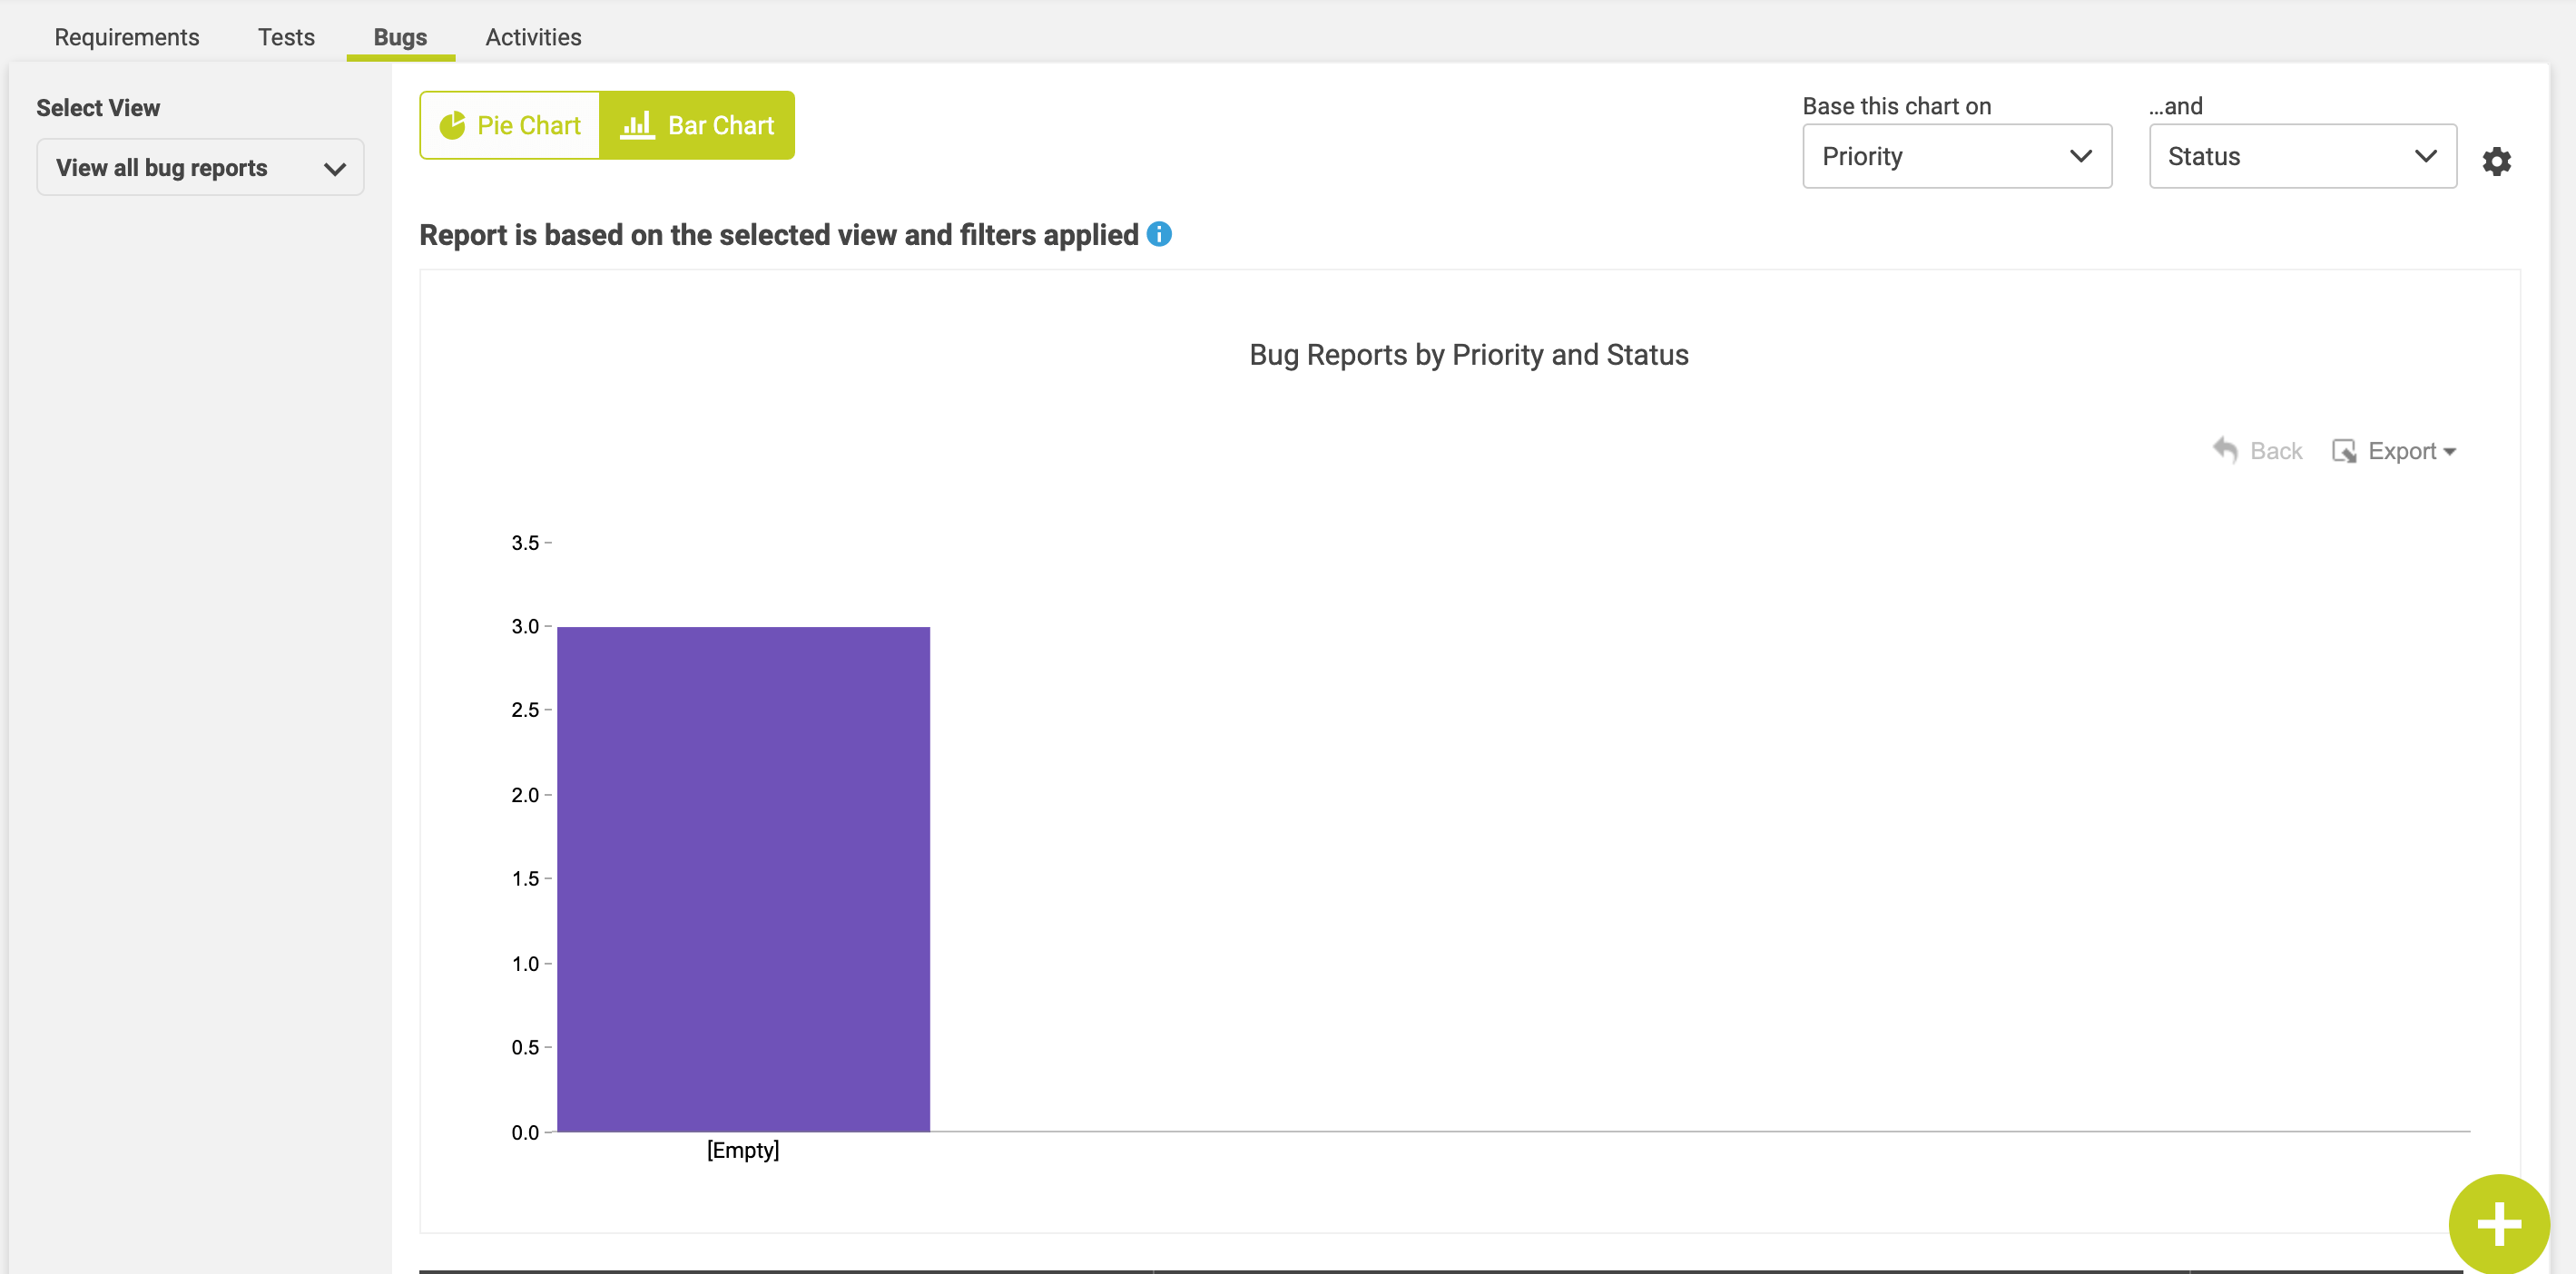
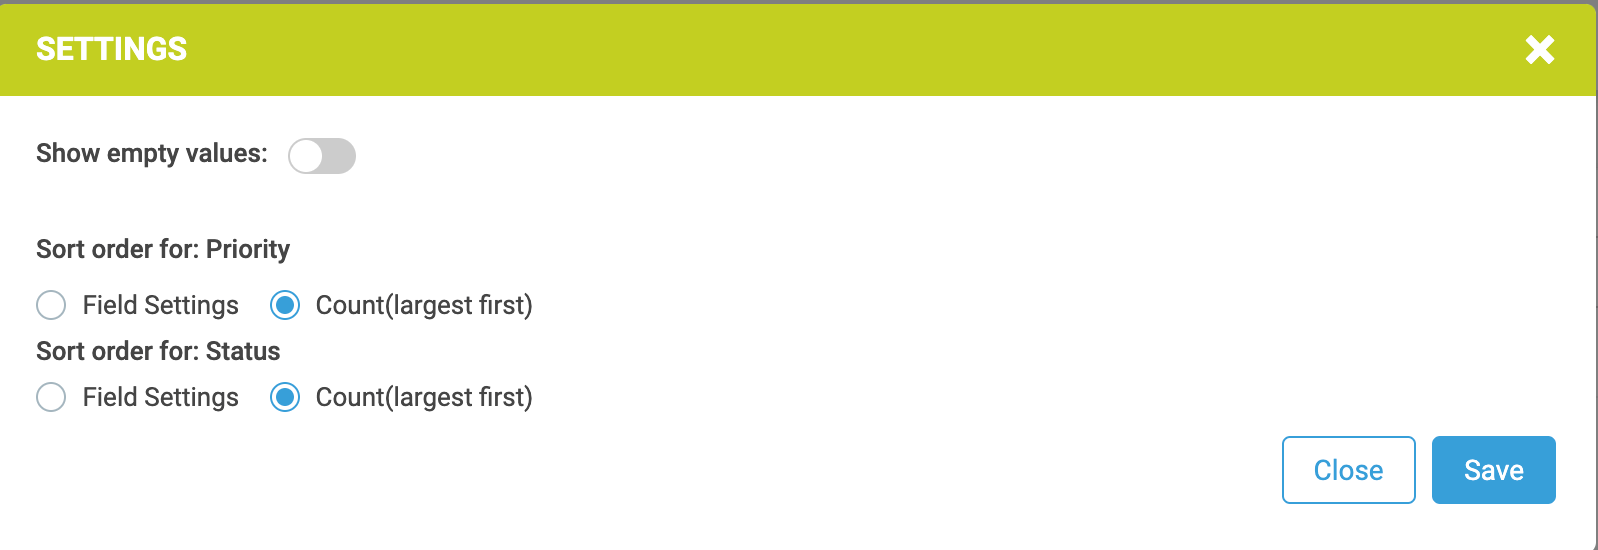
Tip: You can control the order in which columns are displayed in the diagram. You can find the setting for this on the diagram page. If you do not alter this setting the columns might be displayed in the wrong order.
Customizing the requirements form to suit user stories
Many people who work Agile document their requirements in the form of user stories. It will be easier to write requirements if the requirements form in ReQtest is customized for this.
A user story usually looks like this:
As a <type of user>, I want <some goal> so that <some reason>
You can let the requirements form contain a template for user stories using a feature called default text. Default text serves as a template or guide to the requirements analyst and makes it easier to write good requirements.
Here is an example of a template. I’ve used the field “description” and renamed it to user story.
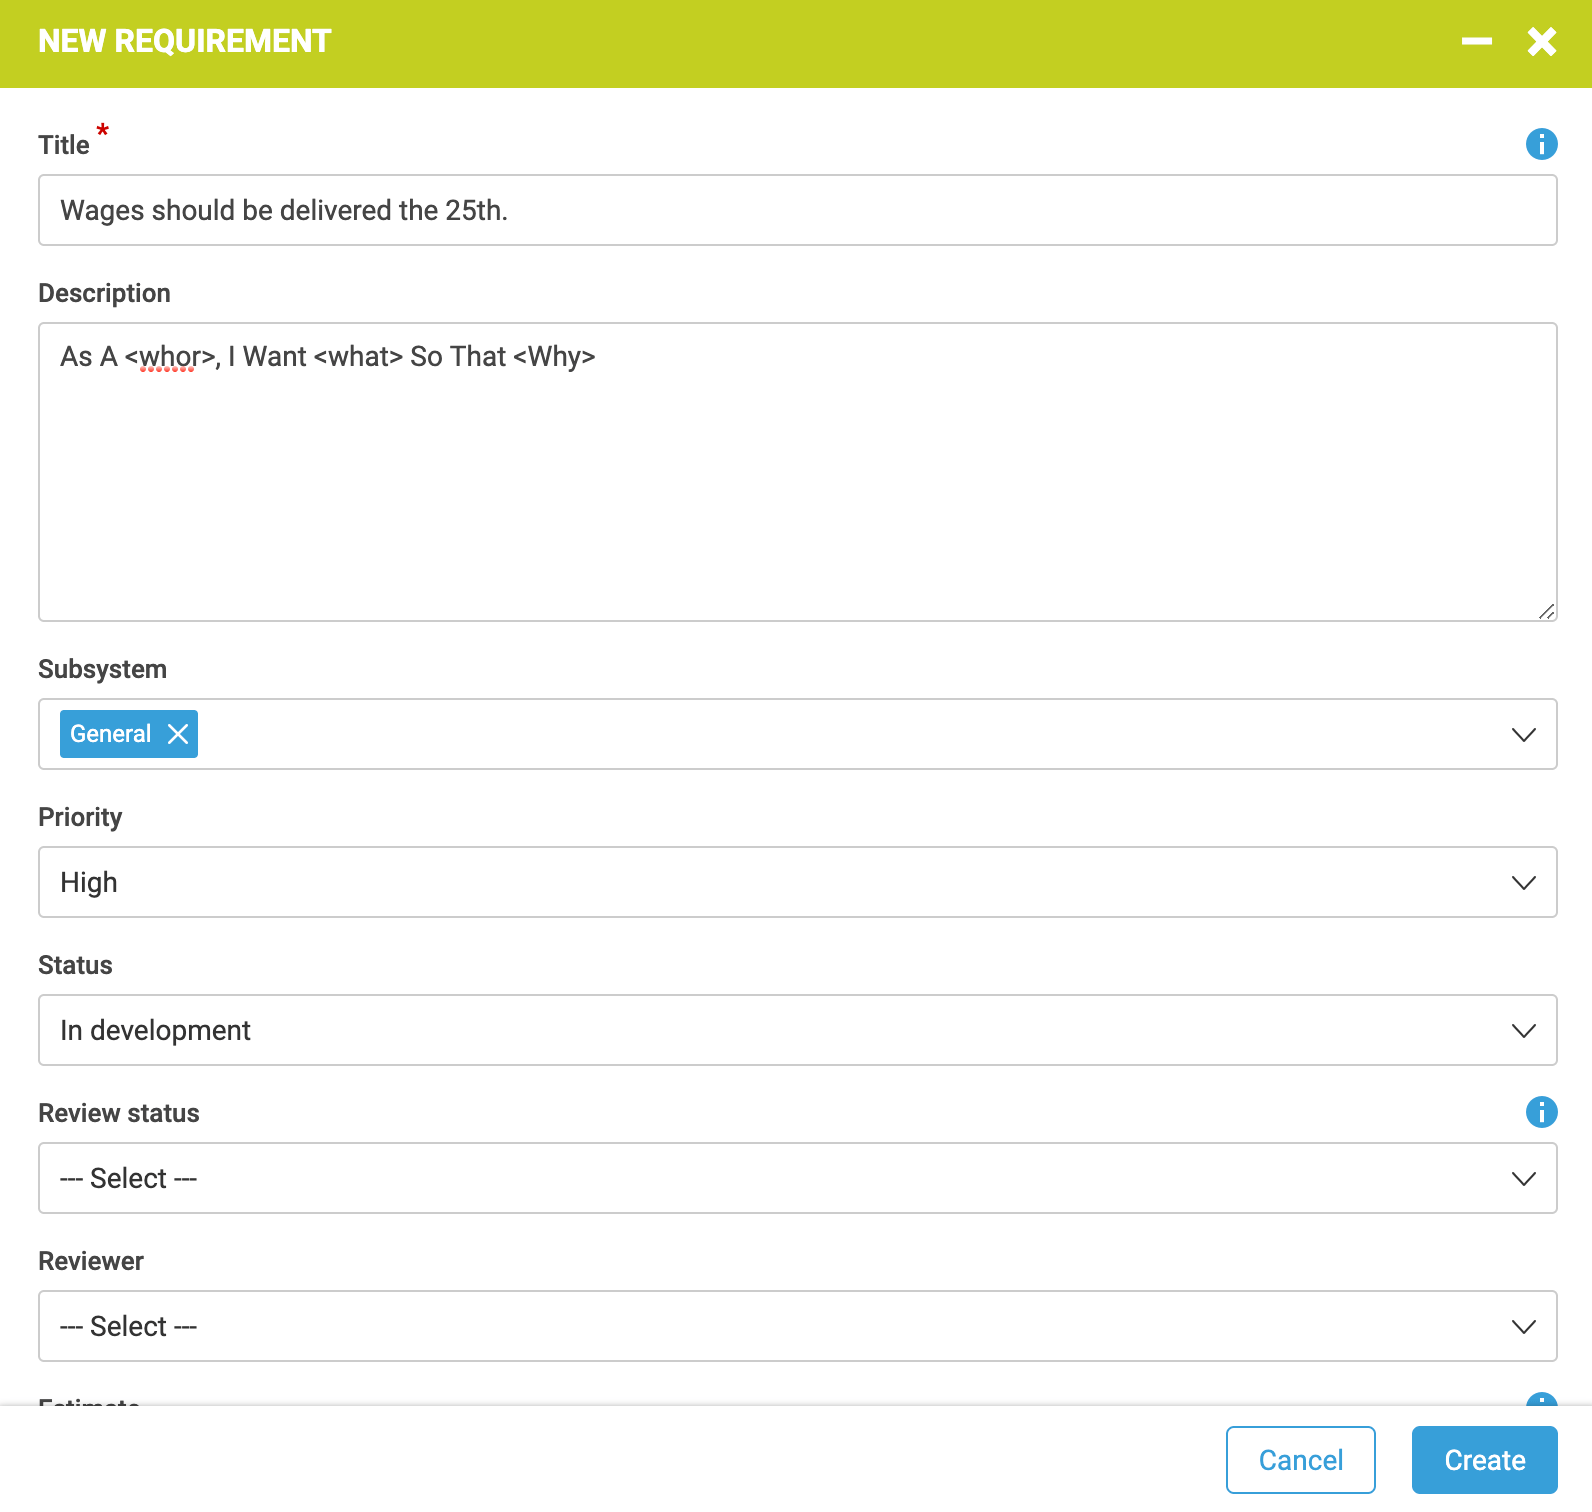 The setting for the template text can be found under the menu settings, field settings. Click on the requirement tab.
The advantage of using a template text is that it is a very compact way of writing requirements because there is no need to add extra fields. Another option is to split the user story in three text fields, such as the following:
• Type of user (or role)
• Goal
• Reason (or motivation)
Maybe you want to add other fields as well? Maybe you use “points” when the team estimates effort using planning poker? Of course you can add a field for this purpose as well if you want.
Remove fields which are not needed
I highly recommend you to remove fields that are not needed in the requirements form. For example if you do not use audits, remove fields for auditor and audit status.
For test cases and bug reports it is more difficult to say which fields are needed when working Agile, but my recommendation is that you go through the settings for your forms and hide the fields you do not feel you really need. This makes the forms easier to fill in. If you need the fields in the future you can easily choose to display them then.
Agile test management
When we are in the middle of a sprint, we do not use the requirements management features to any great extent. However, we do use test functions all the more. During the sprint we use a Scrum board with sticky notes on the wall.
We have the advantage of the whole team sitting together in the same offices, so everyone sees the Scrum board, and for those of you who do not have this advantage, we plan to introduce a Scrum board as a feature in ReQtest in the coming year.
A large part of our tests we automate using tools such as Selenium and NUnit. Of course we also do some manual testing as needed. Some of the testing is done with the help of test cases and some we do with checklists. We also use checklists for many other occasions, such as during deployment. During the tests we write bug reports in ReQtest and use the diagram features extensively.
ReQtest for Exploratory testing
If you want to use exploratory testing, checklists in ReQtest work very well as test ideas. The checklist is a good starting point in exploratory testing and makes the exploratory tests more structured.
Develop an Agile project template
A very useful feature in ReQtest is the ability to create project templates. Simply put, a project template contains everything that you find in the field settings. For example, if you have chosen that prioritization should always be done according to MoSCoW, you can put that in the template.
The template ensures that everyone works uniformly, so it becomes easier to switch from one project to another.
Each time you create a new project, you can choose to base it on a template. If your business works on some agile projects, some projects conducted in the traditional way and some projects related to maintenance, you can create three different project templates to fit these purposes.
If you have many projects in ReQtest it is convenient to name the templates to something that makes the templates show at the top of the list of projects. They could, for example be named _Agile template, _Traditional template and _Maintenance template.
Some final tips
When you add new fields, you probably want them to appear in the lists (for example, the lists “view requirements” and “view bug reports”). The settings that control which columns are to be displayed can be found at the top right of every page. A further tip about the settings for the lists (which is not related to Scrum) is to turn on the display of text fields, such as the field “description”.
If you choose to display this field, the text will appear when you hover over the preview icon, and this makes you get much more out the preview feature. Remember that you can reorder columns by dragging the column header.
Share article